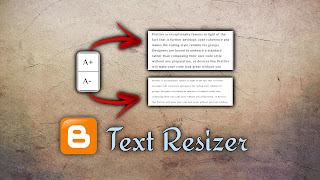
How to Add Text Resizer Feature in your Website

Hey Guys! Welcome back to Techly Series website.
Assuming You are observing the Text Resizer Script on blogger. This is the Right Place to you. Since You can get this Script for free.
Today, in this article, I will Discuss with you about How to Add Text Resizer Feature in your Website.
What is Text Resizer
Text resizing permits clients who are outwardly disabled to expand the size of content without assistive innovation while keeping up with admittance to and usefulness of the substance. Giving a technique to resize text will permit web content to meet WCAG 2.0 AA Guideline 1.4.4. Rule 1.4.4 expects that text can be resized up to 200% of the first size. This rule doesn't demonstrate a particular technique for giving this resizing nor is a "best" approach determined.
Benefits
- Client doesn't need to realize where the on-page controls are to change his/her settings.
- Client text dimension settings can be set once, universally, in a program and need not be set on a for each site premise.
- For the most part, just a solitary template is required.
- Content may naturally reflow when displayed on restricted size presentations and compact gadgets.
- Content might give the capacity to resize past additions determined utilizing Explicit Text Size Method.
- Gives a serious level of command over page design and settings.
- Client shouldn't know about the program's zoom and text size settings.
- Offers help for an enormous number of programs since it doesn't depend on base text dimension of a given program.
- Works reliably across all program zoom highlights.
- Communicates obligation to giving numerous text dimensions to pages.
How to Add
So, to add Text Resizer Feature on blogger you need to follow the following process below precisely.
What's more, with the help of these steps, you can easily add this feature in your blogger website.
Step 1
- You will go to your - Blogger Dashboard
- Go to Theme
- Go to - Edit HTML
- Search - </head> or </head>
- Copy this CSS Code below and Paste on top of </head> or </head>
You must back up your theme before go to Edit HTML
<style>
.Tresizer{position:fixed;right:25px;bottom:150px;background:#ffffff;box-shadow:0 0 5px #000000;border-radius:5px;box-sizing:border-box;z-index:1;transition:all .3s linear}
#Ifont,#Dfont{font-size:18px;padding:10px;box-sizing:border-box;background:#ffffff;color:#000000}
#Ifont{border-radius:5px 5px 0 0;border-bottom:.5px solid #000000}
#Dfont{border-top:.5px solid #000000} #Dfont{border-radius:0 0 5px 5px}
#Ifont:hover,#Dfont:hover{background:linear-gradient(to right,#f81894,#0000ff);color:#ffffff}
</style>
Step 2
- After Paste CSS Code
- Search - </body> or </body>
- Copy this HTML & Javascript Code below and Paste before - </body> or </body>
- Just Replace your_post_body id/class with your post body id/class
- Done.
<b:if cond='data:view.isPost'>
<div class='Tresizer'>
<div id='Ifont'>A+</div>
<div id='Dfont'>A-</div>
</div>
</b:if>
<script>/*<![CDATA[*/
document.querySelector("#Ifont").onclick=function(){var e=document.querySelector("your_post_body id/class"),o=parseFloat(window.getComputedStyle(e,null).fontSize);o<20&&(e.style.fontSize=++o+"px")},document.querySelector("#Dfont").onclick=function(){var e=document.querySelector("your_post_body id/class"),o=parseFloat(window.getComputedStyle(e,null).fontSize);o>10&&(e.style.fontSize=--o+"px")};
/*]]>*/</script>
Final Words
You ought to indeed note by thinking in the remark box underneath. Or on the other hand you moreover bear to give some sort of Suggestion, likewise you can partake your conviction with me in the Comment Box beneath.
I didn't give this content to any individual who saw or replicated them. This content I've looked through a great deal and given by experience. So kindly don't note on this substance.
Assuming you experience any issues while copying this script you can impart me by Telegram and I'll attempt to help.
Post a Comment